A2A Agent Registry Guide
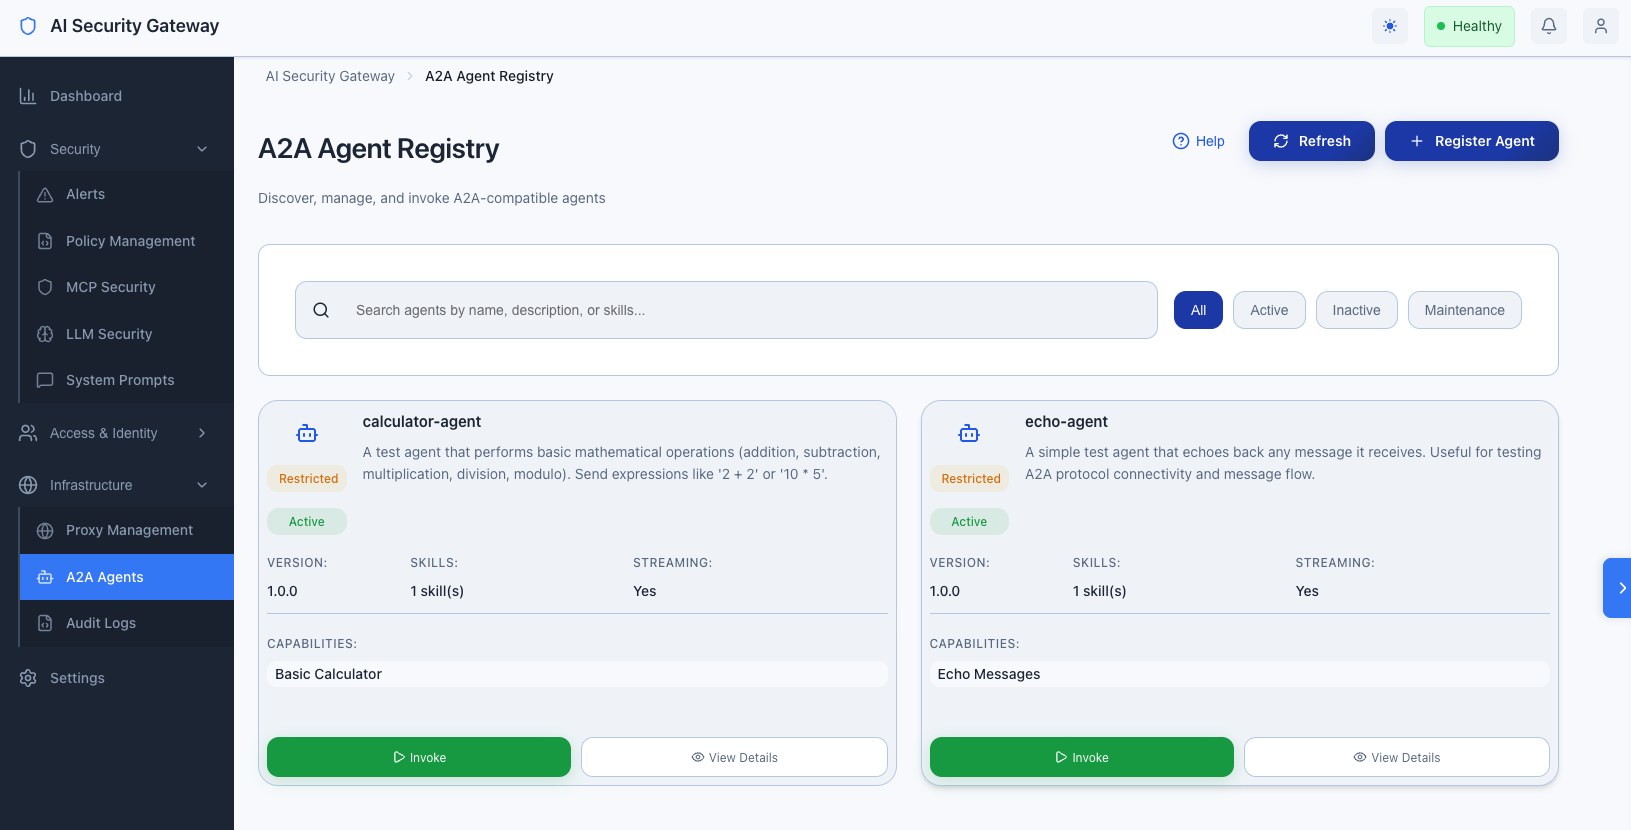
A2A Agent Registry Overview
The AI Security Gateway provides a centralized Agent Registry for managing A2A-compatible agents. This allows you to:
- Register Agents: Discover and register A2A agents via AgentCard URLs or manual JSON
- Manage Access: Control which user groups can access which agents
- Enforce Security: Apply rate limits, security policies, and audit logging
- Invoke Agents: Send messages to agents and manage tasks
- Monitor Activity: View invocation logs and track agent usage

What is A2A?
A2A (Agent-to-Agent) is a protocol specification for agent-to-agent communication. Agents expose an AgentCard (similar to a manifest) that describes their capabilities, supported transports, and security requirements.
Key Concepts
- AgentCard: A JSON document describing an agent's capabilities, skills, and interfaces
- Agent Interface: A URL and transport protocol (JSON-RPC, gRPC, HTTP+JSON) combination
- Task: A stateful operation with lifecycle states (submitted, working, completed, failed, etc.)
- Message: Communication unit between client and agent with Parts (text, file, data)
A2A Agent Registry Getting Started
A2A Agent Registry Prerequisites
- Admin access to the AI Security Gateway
- An A2A-compatible agent running and accessible
- AgentCard available at
/.well-known/agent-card.jsonor as JSON
Agent Registry Quick Start
Navigate to A2A Agents:
- Log in to the Gateway Web Interface
- Click Infrastructure → A2A Agents in the sidebar
Register Your First Agent:
- Click Register Agent
- Choose Auto-Discovery (URL)
- Enter the agent's base URL (e.g.,
http://127.0.0.1:9001) - Click Register Agent
Configure Access Control:
- Click on the registered agent
- Go to the Access Control tab
- Click Add Access
- Select a user group from the dropdown
- Set rate limit (requests per minute)
- Click Add Access
Test the Agent:
- Go to the Invoke tab
- Enter a message
- Click Send Message
- View the response
Registering Agents
Method 1: Auto-Discovery (Recommended)
Auto-discovery automatically fetches the AgentCard from the agent's /.well-known/agent-card.json endpoint.
Steps:
- Click Register Agent on the A2A Agents page
- Select Auto-Discovery (URL)
- Enter the agent's base URL:
- Example:
http://127.0.0.1:9001 - Example:
https://api.example.com/agent
- Example:
- Click Register Agent
Requirements:
- Agent must be running and accessible
- AgentCard must be available at
/.well-known/agent-card.json - URL must be accessible from the Gateway server
Method 2: Manual AgentCard JSON
If auto-discovery isn't possible, you can paste the AgentCard JSON directly.

Steps:**
- Click Register Agent on the A2A Agents page
- Select Manual (AgentCard JSON)
- Paste the complete AgentCard JSON
- Click Register Agent
AgentCard Structure:
{
  "protocol_version": "1.0",
  "name": "Example Agent",
  "description": "An example A2A agent",
  "version": "1.0.0",
  "supported_interfaces": [
    {
      "url": "http://127.0.0.1:9001",
      "protocol_binding": "JSONRPC"
    }
  ],
  "capabilities": {
    "streaming": true
  },
  "default_input_modes": ["text/plain"],
  "default_output_modes": ["text/plain"],
  "skills": [
    {
      "id": "example-skill",
      "name": "Example Skill",
      "description": "Performs example operations",
      "tags": ["example", "test"]
    }
  ]
}
Agent Registration via API
# Get JWT token (admin login)
TOKEN=$(curl -X POST http://localhost:8080/api/v1/auth/login \
  -H "Content-Type: application/json" \
  -d '{"username":"admin","password":"your-password"}' \
  | jq -r '.data.token')

# Register agent via URL
curl -X POST http://localhost:8080/api/v1/agents \
  -H "Content-Type: application/json" \
  -H "Authorization: Bearer $TOKEN" \
  -d '{
    "name": "my-agent",
    "url": "http://127.0.0.1:9001"
  }'

# Register agent via AgentCard JSON
curl -X POST http://localhost:8080/api/v1/agents \
  -H "Content-Type: application/json" \
  -H "Authorization: Bearer $TOKEN" \
  -d '{
    "name": "my-agent",
    "agent_card": "{\"protocol_version\":\"1.0\",\"name\":\"My Agent\",...}"
  }'
Managing Agents
Viewing Agents
- List View: See all registered agents on the A2A Agents page
- Detail View: Click an agent card to see full details
- Filtering: Use search to find agents by name
Updating Agents
- Navigate to the agent detail page
- Click Edit (pencil icon)
- Update the AgentCard JSON
- Click Update Agent
Note: Updating an agent refreshes its AgentCard from the original URL if auto-discovery was used.
Refreshing AgentCard
The Gateway can refresh an agent's AgentCard from its original URL:
- Navigate to the agent detail page
- Click Refresh AgentCard (refresh icon)
- The AgentCard will be re-fetched and updated
Deleting Agents
- Navigate to the agent detail page
- Click Delete (trash icon)
- Confirm deletion
Warning: Deleting an agent removes all access controls and audit logs associated with it.
Agent Access Control
Access Control Overview
Access control determines which user groups can invoke which agents. This follows the same pattern as proxy access control.
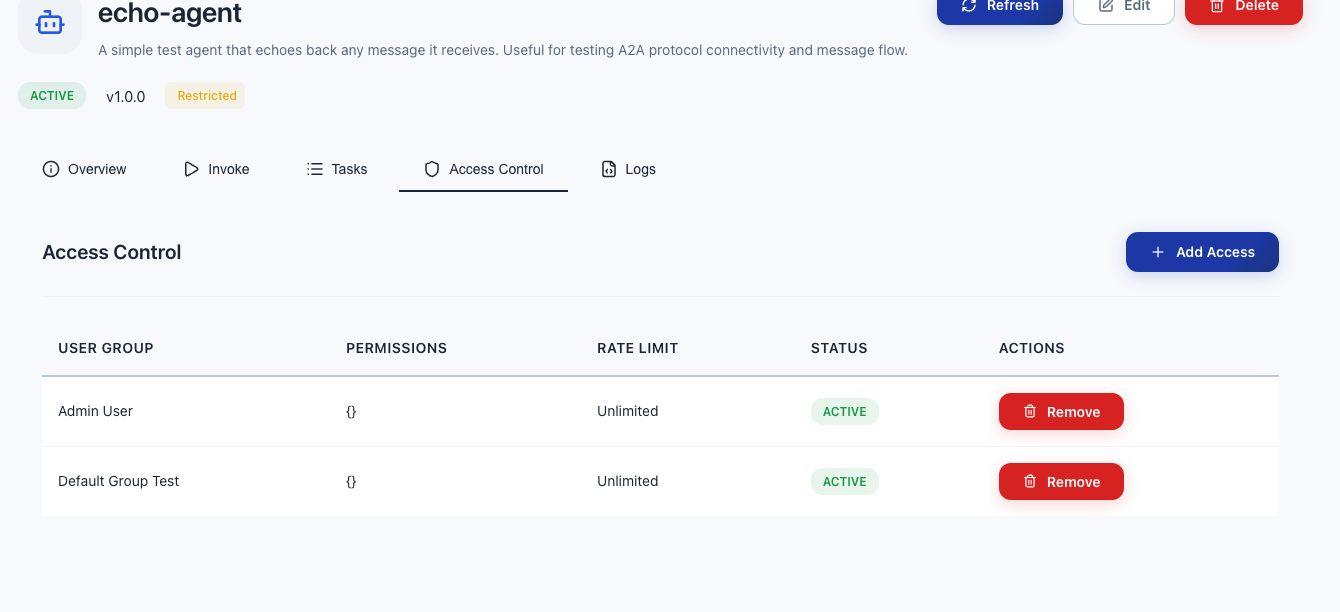
Adding Access Control
- Navigate to the agent detail page
- Go to the Access Control tab
- Click Add Access
- Select a User Group from the dropdown
- Set Rate Limit (requests per minute, 0 = unlimited)
- Toggle Active status
- Click Add Access
Access Control Rules
- User Groups: Only users in assigned groups can access the agent
- Rate Limiting: Enforced per user group (requests per minute)
- Active Status: Inactive access controls deny access
- Admin Users: Admins can access all agents (subject to rate limits)
Removing Access Control
- Navigate to the agent detail page
- Go to the Access Control tab
- Find the access control entry
- Click Remove (trash icon)
- Confirm removal
Access Control via API
# List access controls for an agent
curl -X GET http://localhost:8080/api/v1/agents/1/access \
  -H "Authorization: Bearer $TOKEN"

# Create access control
curl -X POST http://localhost:8080/api/v1/agents/1/access \
  -H "Content-Type: application/json" \
  -H "Authorization: Bearer $TOKEN" \
  -d '{
    "user_group_id": 1,
    "rate_limit": 10,
    "active": true
  }'

# Delete access control
curl -X DELETE http://localhost:8080/api/v1/agents/1/access/1 \
  -H "Authorization: Bearer $TOKEN"
Invoking Agents
Agent Registry Via Web Interface
- Navigate to the agent detail page
- Go to the Invoke tab
- Enter your message in the text area
- (Optional) Enable Streaming Mode for real-time responses
- Click Send Message
- View the response in the response area
Message Format
Messages follow the A2A protocol format:
{
  "message": {
    "role": "user",
    "parts": [
      {
        "kind": "text",
        "text": "Your message here"
      }
    ]
  },
  "streaming": false
}
Streaming Responses
When streaming is enabled, responses are delivered via Server-Sent Events (SSE) in real-time. This is useful for:
- Long-running operations
- Real-time updates
- Progress indicators
Invoking Agents via API
# Non-streaming invocation
curl -X POST http://localhost:8080/api/v1/agents/1/invoke \
  -H "Content-Type: application/json" \
  -H "X-API-Key: YOUR_API_KEY" \
  -d '{
    "message": {
      "role": "user",
      "parts": [{"kind": "text", "text": "Hello, agent!"}]
    },
    "streaming": false
  }'

# Streaming invocation (returns SSE stream)
curl -X POST http://localhost:8080/api/v1/agents/1/invoke \
  -H "Content-Type: application/json" \
  -H "X-API-Key: YOUR_API_KEY" \
  -d '{
    "message": {
      "role": "user",
      "parts": [{"kind": "text", "text": "Hello, agent!"}]
    },
    "streaming": true
  }'
Monitoring and Logs
Viewing Invocation Logs
- Navigate to the agent detail page
- Go to the Logs tab
- View invocation logs with:
- Timestamp
- User information
- Task ID
- Duration
- Status (Allowed/Blocked)
- Risk Score
- Rate limit information
Log Details
Click View on any log entry to see:
- Complete request/response payloads
- Policy hits
- Block reasons (if blocked)
- Source IP and User Agent
- Full audit trail
Log Filtering
Logs are automatically filtered by:
- Agent ID
- Time range (most recent first)
- Pagination (50 logs per page)
Logs via API
# Get agent logs
curl -X GET "http://localhost:8080/api/v1/agents/1/logs?limit=50&offset=0" \
  -H "Authorization: Bearer $TOKEN"
A2A Agent Registry Rate Limiting
Rate Limiting Overview
Rate limiting prevents abuse by limiting the number of requests per minute per user group.
Configuring A2A Rate Limits
- Navigate to the agent detail page
- Go to the Access Control tab
- Add or edit an access control entry
- Set Rate Limit (requests per minute)
0= unlimited10= 10 requests per minute60= 60 requests per minute
Rate Limit Behavior
- Enforcement: Applied per user group per agent
- Window: 1 minute rolling window
- Exceeded: Returns HTTP 429 (Too Many Requests)
- Error Message: "rate limit exceeded: X requests per minute"
Rate Limit Headers
When rate limits are exceeded, the API returns:
- Status Code: 429 Too Many Requests
- Error Code:
RATE_LIMIT_EXCEEDED - Error Message: Includes the limit that was exceeded
A2A Agent Registry Security Features
Policy Engine Integration
All agent invocations are validated by the Gateway's policy engine:
- Request Validation: Message parts are checked against security policies
- Risk Scoring: Each request receives a risk score (0-100)
- Blocking: Requests can be blocked if they violate policies
- Audit Logging: All policy hits are logged
A2A Audit Logging
Comprehensive audit logging tracks:
- User Attribution: Who invoked the agent (API key or JWT user)
- Request/Response: Full payloads (sanitized)
- Security Events: Policy hits, blocks, risk scores
- Rate Limiting: Rate limit applications and violations
- Task Tracking: Task IDs and states
Audit Access Control
- User Group Based: Access is controlled per user group
- API Key Authentication: Required for programmatic access
- JWT Authentication: Supported for admin users via Web Interface
- Fine-Grained: Per-agent access control
A2A Agent Registry Troubleshooting
Agent Registration Fails
Problem: Cannot register agent via URL
Solutions:
- Verify agent is running:
curl http://127.0.0.1:9001/.well-known/agent-card.json - Check network connectivity from Gateway server
- Verify URL format (base URL, not full path)
- Check Gateway logs for detailed error messages
Agent Invocation Fails
Problem: Cannot invoke agent
Solutions:
- Verify agent is still running and accessible
- Check access control: Ensure your user group has access
- Check rate limits: Verify you haven't exceeded the limit
- Review logs: Check the Logs tab for error details
- Verify API key: Ensure API key is valid and has access
A2A Rate Limit Errors
Problem: Getting "rate limit exceeded" errors
Solutions:
- Check current rate limit: View access control settings
- Wait for rate limit window to reset (1 minute)
- Request rate limit increase from administrator
- Use multiple API keys with different user groups
Agent Not Found
Problem: Agent appears in list but cannot be accessed
Solutions:
- Verify agent status is "active"
- Check access control: Ensure your user group has access
- Verify API key user group matches access control
- Check Gateway logs for access denial reasons
A2A Agent Registry Best Practices
Agent Registration
- Use Auto-Discovery: Prefer URL-based registration for automatic updates
- Verify AgentCards: Ensure AgentCards are valid and complete
- Test Connectivity: Verify agents are accessible before registering
- Use HTTPS: In production, use HTTPS URLs for agents
Access Control Best Practices
- Principle of Least Privilege: Only grant access to necessary user groups
- Rate Limiting: Set appropriate rate limits based on expected usage
- Regular Audits: Review access controls periodically
- Documentation: Document why each access control exists
A2A Agent Registry Security
- Policy Enforcement: Ensure security policies are configured
- Audit Logging: Regularly review audit logs
- Rate Limiting: Configure rate limits to prevent abuse
- Monitoring: Monitor agent usage and patterns
A2A Agent Registry Operations
- Agent Health: Monitor agent availability
- Task Management: Clean up old tasks periodically
- Log Retention: Configure appropriate log retention periods
- Backup: Include agent registry in backup procedures
Agent Registry Related Documentation
- A2A API Reference - Complete API documentation
- A2A Protocol Technical Guide - Technical implementation details
- API Key Authentication - Managing API keys
- Audit Logging - Understanding audit logs
Need Help? Check the Troubleshooting Guide or review the API Reference for detailed endpoint documentation.