OAuth Proxy Guide
This guide shows how to enable OAuth authentication on your MCP and LLM proxies using the OAuth Proxy feature.
What is OAuth Proxy?
OAuth Proxy adds user authentication to your proxies, ensuring that only authorized users can access MCP tools or LLM services. When enabled:
- Users must authenticate through an OAuth provider before accessing the proxy
- MCP clients automatically handle token exchange through Dynamic Client Registration (DCR)
- User permissions can be configured per proxy and per tool
- All requests are audited with user identity
Prerequisites
- OAuth provider configured (see OAuth Provider Setup Guide)
- At least one proxy created (MCP or LLM)
- Admin access to the web interface
Step 1: Choose Proxy Mode
The Gateway supports two OAuth proxy modes:
Gateway Mode (Recommended)
The Gateway handles all OAuth authentication before forwarding requests to your MCP/LLM server.
When to use:
- Your MCP/LLM server doesn't support OAuth
- You want centralized user authentication
- You need user-level audit trails
- Most common use case
Flow:
User → Gateway (OAuth check) → MCP/LLM ServerUpstream Mode
The Gateway forwards OAuth tokens to your MCP/LLM server for validation.
When to use:
- Your MCP/LLM server has its own OAuth implementation
- You want the server to make authorization decisions
- Less common, advanced use case
Flow:
User → Gateway (pass token) → MCP/LLM Server (OAuth check)For most users, use Gateway Mode.
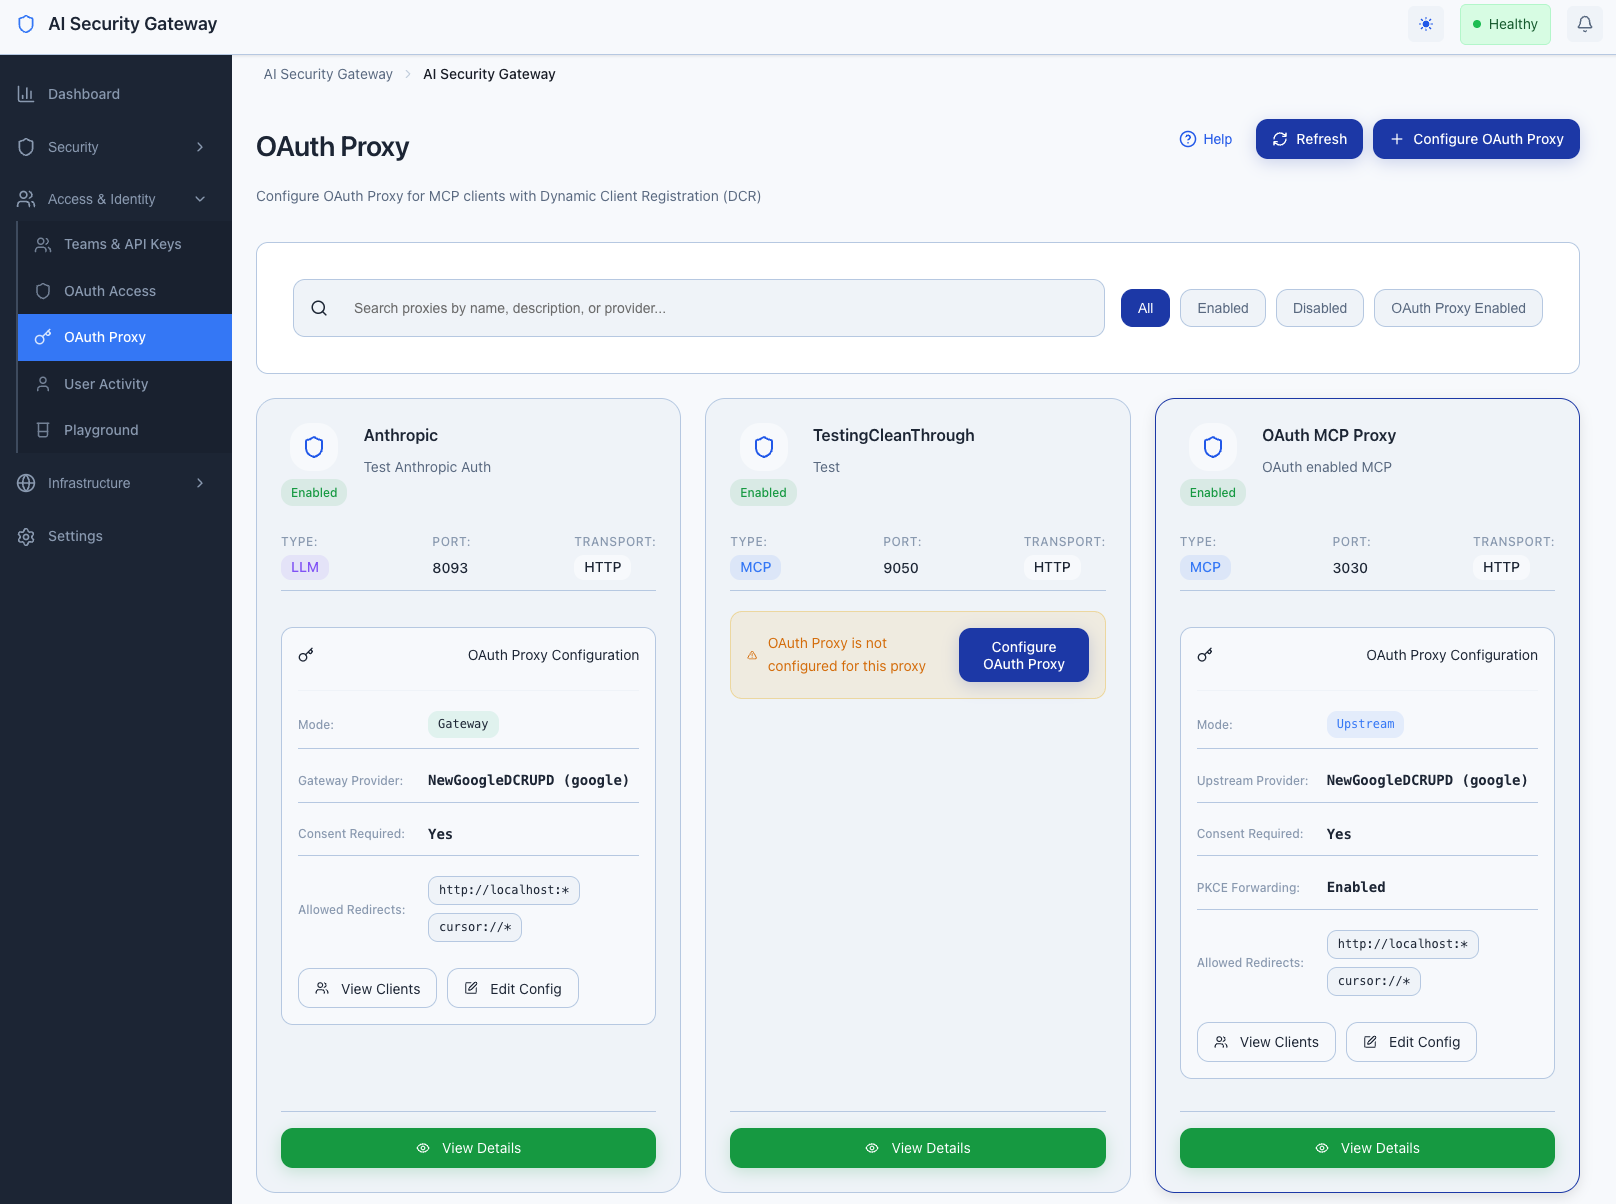
Step 2: Enable OAuth on Proxy
Using the Web Interface
Navigate to OAuth Proxy in the sidebar
Find your proxy in the list
Click "Enable OAuth" button for your proxy
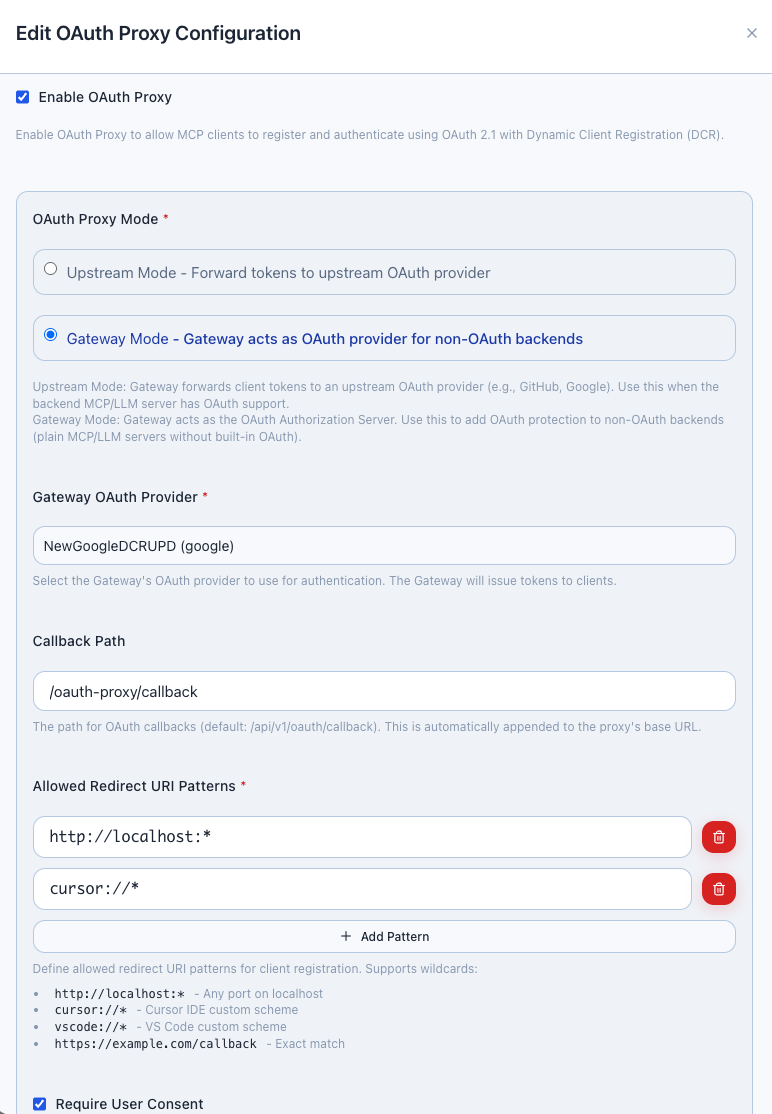
In the configuration form:
- OAuth Mode: Select "Gateway" (recommended)
- Client Name: Auto-filled (proxy name)
- Client Type: Select "confidential"
- OAuth Provider: Select your configured provider
Click "Save Configuration"
The proxy now requires OAuth authentication
Step 3: Configure Dynamic Client Registration (MCP Only)
For MCP proxies, Dynamic Client Registration allows MCP clients to automatically obtain OAuth tokens.
Enable DCR Endpoint
- In the OAuth Proxy configuration for your MCP proxy
- Ensure DCR Endpoint is enabled (enabled by default)
- Note the DCR URL:
http://localhost:8080/oauth/dcr
[Screenshot: DCR configuration section showing endpoint URL]
MCP Client Configuration
MCP clients (Claude Desktop, Cursor, etc.) automatically use DCR. Add to your client's configuration:
{
  "mcpServers": {
    "your-mcp-server": {
      "url": "http://localhost:8080",
      "transport": "http",
      "oauth": {
        "clientId": "auto",
        "clientSecret": "auto",
        "authorizationEndpoint": "http://localhost:8080/oauth/authorize",
        "tokenEndpoint": "http://localhost:8080/oauth/token"
      }
    }
  }
}
The client will:
- Automatically register with the Gateway
- Open browser for user authentication
- Exchange authorization code for access token
- Include token in all MCP requests
Step 4: Assign User Groups (Optional)
Control which users can access the proxy by assigning user groups:
- Navigate to OAuth Proxy
- Find your OAuth-enabled proxy
- Click "Manage Groups"
[Screenshot: User Groups assignment modal]
- Select allowed user groups:
- Engineering Team
- Data Science Team
- Administrators
- Click "Save"
Now only users in selected groups can access the proxy.
Step 5: Configure Tool Permissions (MCP Only)
For MCP proxies, you can set permissions per tool:
- Navigate to OAuth Proxy → Tool Permissions
- Select your MCP proxy
- View discovered tools with permission toggles
[Screenshot: Tool Permissions page with tool list and toggles]
For each tool:
- Enabled: All authorized users can use
- Disabled: No users can use (tool blocked)
- Group-Restricted: Only specific user groups
Click "Save Permissions"
Step 6: Monitor OAuth Sessions
View Active Sessions
- Navigate to OAuth Access → OAuth Users
- Select a user to view:
- Active sessions per proxy
- Token expiration times
- Last request timestamp
[Screenshot: OAuth Users detail showing active sessions]
Revoke Access
To revoke a user's access:
- Navigate to OAuth Access → OAuth Users
- Find the user
- Click "Revoke Sessions"
- User must re-authenticate to regain access
Testing OAuth-Enabled Proxy
MCP Proxy Test
- Configure your MCP client with OAuth settings (Step 3)
- Start the MCP client
- Client opens browser for authentication
- Approve access in the consent screen
- Client automatically receives access token
- MCP tools are now accessible
LLM Proxy Test
- Make a request to the LLM proxy:bash
curl -H "Authorization: Bearer YOUR_TOKEN" \ http://localhost:8080/v1/chat/completions - Without token: Returns
401 Unauthorized - With valid token: Request forwarded to LLM server
Gateway vs Upstream Mode Comparison
| Feature | Gateway Mode | Upstream Mode |
|---|---|---|
| OAuth handling | Gateway validates tokens | Server validates tokens |
| MCP/LLM server requirements | No OAuth support needed | OAuth implementation required |
| User audit trails | Full audit in Gateway | Depends on server |
| Token forwarding | Not forwarded | Forwarded to server |
| Recommended for | Most users | Advanced integrations |
Common Configurations
Multiple Proxies with Same OAuth Provider
You can enable OAuth on multiple proxies using the same OAuth provider:
GitHub OAuth Provider
  ├── MCP Proxy 1 (OAuth enabled)
  ├── MCP Proxy 2 (OAuth enabled)
  └── LLM Proxy 1 (OAuth enabled)
Each proxy maintains independent user sessions and permissions.
Mixed OAuth and Non-OAuth Proxies
You can run OAuth-enabled and non-OAuth proxies simultaneously:
- Public Proxy: No OAuth (open access)
- Protected Proxy: OAuth required (user authentication)
Troubleshooting
MCP client fails to authenticate:
- Verify DCR endpoint is enabled
- Check OAuth provider is configured and active
- Review Gateway logs for specific error
User can't access proxy after authentication:
- Verify user is assigned to allowed user groups
- Check tool permissions (MCP only)
- Ensure proxy OAuth configuration is saved
Token expired errors:
- Tokens automatically refresh for MCP clients
- For API access, request a new token through OAuth flow
For detailed technical information, see the OAuth Proxy Technical Documentation.
Next Steps
Advanced User Management
- User Group Management - Create and manage user groups
- Group Rules - Automate user assignments
Integration
- SIEM Integration - Send OAuth audit events to SIEM
- API Access - Programmatic OAuth token management
Related Guides
- OAuth Provider Setup Guide - Configure OAuth providers
- Multi-Proxy Management - Managing multiple proxies
Security Notes
- All OAuth flows use PKCE for enhanced security
- Tokens are encrypted in transit and at rest
- Session tokens expire automatically (configurable)
- User access can be revoked instantly
Note: The Gateway handles encryption and token management transparently - no manual configuration required.